Bulk Liquids!

Switching to Slow

Hi! Its been three months since I’ve posted on here, but I decided to return since I’ve just moved to Portland! It’s been a long time coming, but I finally saved up enough money and got rid of enough stuff that I could move out of my mom’s. I’ve got 4 awesome roommates, and I’m living two blocks off of Mississippi, which is an amazing and delicious neighborhood. Also half a mile away is an awesome health food store called New Seasons Market, where there are a lot of great bulk buying and healthy options! Ultimately, my goal is to eliminate as much plastic as possible from my life, but its hard to do when it comes to liquids that need to be in a squeezable container. Before I left Eugene, I picked up two squeezy bottles at a Natural Grocers, and also found an empty shampoo bottle in my bathroom that was perfect. I planned out my shampoo use before my move, so I ran out the day before leaving, so when I got here, one of the first things I did was go get myself some shampoo and conditioner in bulk!

Shampoo

It feels good to check another thing off the list of waste that I will no longer create. True, the best thing to do would be to not use shampoo at all and go the way of the recently popular “no poo” method, but I really didn’t like how it made my hair feel, and I think it may have encouraged a rash on my mouth. So I’m just as happy with bulk shampooing. The most important realization I’ve had is that ultimately, what shampoo I use doesn’t make that big of a difference. Maybe for some people it does, but there is no reason to waste a lot of money and plastic just for the placebo effect of having better hair.

olive oil

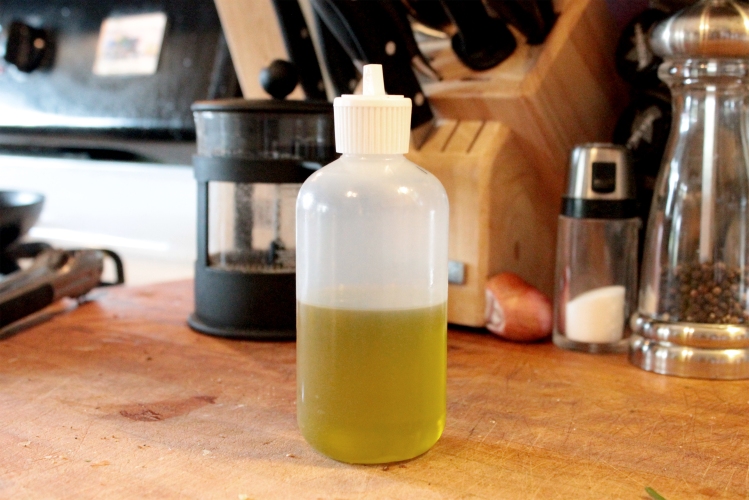
Another great thing about New Seasons, and I’m sure many other healthy grocers, is the fact that you can get things like olive oil and honey in bulk! I went back the other day and filled up my last squeezy bottle with olive oil, and not only does it weigh less and cost less than a glass bottle, its also WAY more convenient for use. You just squeeze a little in the pan and don’t have to worry about spilling or anything. Its the best 😀

So remember that buying single use products its an easy cycle to break if you make the decision to do it!


Avocado Dye! Part 2

Natural Dyes

prewashed

In Part one of my post on avocado dye, I left with the dye looking sad and murky and wondering how to improve it. As I like to do with any dye I haven’t worked with before, I do a pH test to see if I can get a better color than what the tap water will give me.  In the photo below, I took three equal sized samples of the dye – the one in the middle is the natural pH, which, given that avocados are basic, was probably a little higher pH that neutral, but I call it neutral for practicality’s sake. The left sample I added some lemon juice and vinegar to, and although the lighter pink color was closer to what I was hoping to get from the dye, it also weakened the strength of the solution overall.

ph test

The one on the right was what I decided to go with, because although it was not the color I was hoping to get, it was by far the strongest looking dye, and I read elsewhere that avo dye works best when very basic. So then I added some soda ash that I made myself a year or so ago, putting in good few shakes – maybe 3-4 tablespoons – to the dye bath.

soda ash

I was really sad that it didn’t make too much of a difference to add the soda ash initially, and I resigned to believing I would get a boring beige-yellow cowl in the end.

browndye

While submerging the wool though, I accidentally smooshed one of the pits in the bath. I had decided to filter out just the skins, in hopes that the pits would make it more pink. This is where the magic happened! I noticed that after soaking, the pits had gone from being a colorless white, to being pink, grey, and even a deep rose in some parts. I found that after soaking overnight, they were mushy and could be ground to nearly dissolve in the water. I mushed all of them  up, and threw them back in the pot, hoping for a miracle.

Wool only shrinks when shocked with a sudden and drastic temperature change, so I put the burner on very low (like 2.5/10) and left it to simmer for upwards of 4 hours. Then I turned the heat off and left it to sit longer overnight.

mushypits

I woke up on Christmas morning the next day to find the best gift of all – my dye bath had turned an amazing shade of deep red! At times it was almost a blood red, and was very opaque and rich. Although the bath had been diluted by almost 100% the day before, raising the pH and dissolving the pits made up for it and created this wonderful color.

redbath!

So beautiful!!

closeupred

After wringing out the cowl very well, but not rinsing it, I let it dry in the bathroom for two days. I don’t recommend doing this with finely woven/knit fibers, as the dye particles will shift with gravity and dye unevenly throughout the fabric. I’ve learned this the hard way. But because of the uneven nature of the wool, I decided to do it because it wouldn’t show much, just to be sure the dye was holding. After it dried, I gave it a good rinse under room temp to lukewarm water. This took about 10 minutes to get the water to run mostly clear.


Here it is after two days drying!

In the end, I’m pretty happy with the results because I ended up getting just the color I wanted! The exhaust bath (if you could even call it that), still had plenty of kick left to dye another little cotton scarf I had scoured from a while ago (no mordant). Even after all that, I saved most of it in a jar, and its still very much rich and opaque and ready to keep on going strong.

scarftable scarfcloseup mescarf

Look at how dark the leftover dye still is!!

jardyecottonscarf cotcloseuptwocolors

twoscarvesThe end! Thanks for reading!!


Scouring Wool

Natural Dyes

woolball

While I wait for my wool cowl to dry so I can finish up Part 2 of my post on avocado dye, I decided to do a sort of Part 2.5 post about how I scoured the wool for dyeing.

Ideally, I should have scoured the yarn before I crocheted it, but I didn’t want to deal with the insanity of re-balling it from the heaping mess of a knot it would have inevitably become.

cowl

After running it under room temp water and thoroughly saturating it with some gentle organic dish soap, I put it in a pot, added a little more soap, and left it. Almost immediately, the water turned a cloudy color as the dirt and oil came off.

scoured


Something was so satisfying and grounding about feeling the oil from the wool on my hands as I crocheted. It was nice to feel a connection to the material in a way that you don’t really get with other fibers, except maybe raw cotton. In a similar way, it was just as satisfying to see the oil and dirt be washed away in the scouring bath, but also because it made me feel reassured that I was actually doing things right!


oil

After letting the wool sit in the scouring bath over night, I rinsed it thoroughly, and let it sit while I measured out the mordant. I used alum as a premordant, and cream of tartar, which is used for animal fibers along with the mordant for reasons I have yet to learn. It is really important that you remember to weigh your goods before they get wet so you can calculate the right amount of mordant without being wasteful.

alumtartar

I like to use shot glasses for my measuring and whatnot because they are small, clean well, and are transparent. Using the ratios here, I found that my 3.1 oz of wool fiber (make sure you’re converting to grams if your scale reads in ounces!!) needs .25 oz of alum , and .22 oz of cream of tartar. The amount of water I found to be pretty arbitrary overall, but its good to mix the alum separately in a small amount of warm water first before adding it to the bath, so you can be sure that it is completely dissolved.

shotalum

I was a little wary of putting wool in water that was already a little warm, so I made sure it was just warm enough to dissolve the powders, then let it set for a few minutes before adding the wool to soak overnight. Before dying it, I gave it a light rinse to as not to wash out the alum, and put it, still wet in to the dye bath.

potalum

See how this wool cowl turned out tomorrow, when I conclude my avocado dye foray.